don't miss out

sign-up for newsletter to stay in the loop

subscribe to our newsletter

Newsletter
download

How to add Backuply Cloud Storage

All-in-one solution for Backup, Restore and Migration.

How to add Backuply Cloud Storage

In this article we will help you get started with Backuply Cloud storage. Backuply Cloud is Backuply's storage offering.

Note: This article is targeted for users who are using Backuply Cloud for their site for the first time

Here we are assuming that you already have already linked Backuply plugin with the license. Just to make it clear, Backuply Cloud key and Backuply License are different things.

If you want to know how to link Backuply plugin with license please check How to Link License in Backuply

How to Add Backuply Cloud

We will now see how to add Backuply Cloud as the storage Location:-
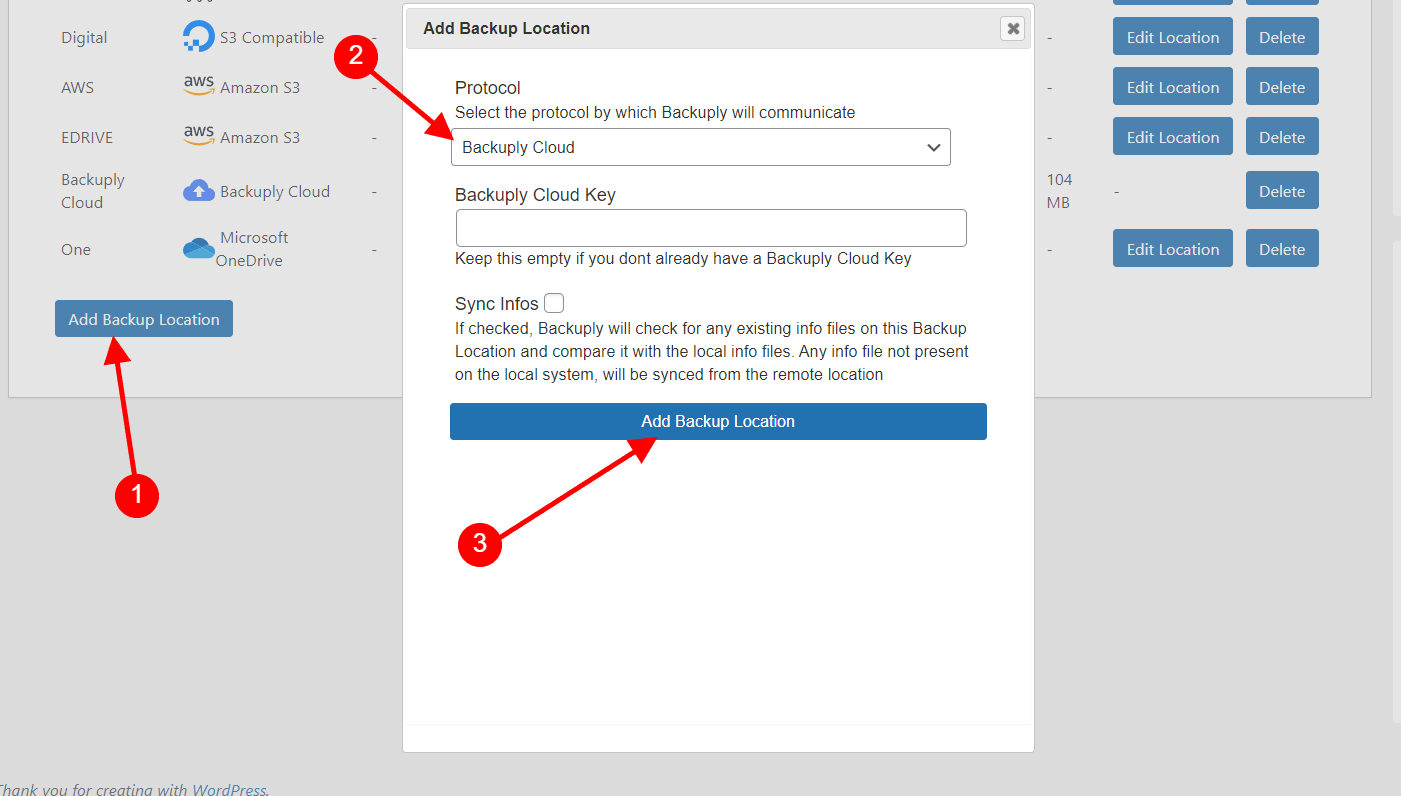
  • In Backuply Dashboard in your WordPress admin go to Backup Location Tab.
  • In Backup Location tab click on Add Backup Location.
  • A form will popup and in the form in Protocol field select Backuply Cloud.
  • There will be another field which says Cloud Key, if you are using Backuply Cloud for the first time then leave that field empty and click on Add Backup Location.
    If you have used your website before with Backuply Cloud then check this docs How to get Backuply Cloud Key and once you get the key you can fill it in the field and then Save the Backup Location.
  • Now you can backup your site to Backuply Cloud.
Adding Backuply Cloud backup location

If you face any issue contact our support team support@backuply.com and we will help you out.

    Was this page helpful?
    Newsletter Subscription
    Subscribing you to the mailing list