Custom backups are easy to set up but require you have access to your Control Panel, as they use Cron Job feature available in your Control Panel. So in this article we will see how to set up custom auto backup.
Requirments
Why use Cron Job?
The regular auto backups in Backuply uses WP Cron which is a Cron* functionality cooked into WordPress. The issue with WP Cron is that it is limited because it is not an actual Cron, it's a pseudo Cron.
For those who don't know what Cron is, it is a scheduler which does the task at regular intervals of time, or regularly at a specific time. The way it is different from WP Cron is, WP Cron only works if someone visits your website or you visit your website, as all it checks when you visit your website is if the time has passed when a specific task was suppose to happen or not, so suppose a task was supposed to happen every 24 hours but no once visits your website then WP-Cron will not work.
Where as Cron of your Control Panel is much more flexible and powerful as it works on operating system level and does not need user to visit for it to work, and that is the reason we have too use it for custom cron.
Setting up Cron Job
Note: In this docs we are using Webuzo as our Control Panel, but if you are on different control panel then the process will be the same the UI might be a little different.
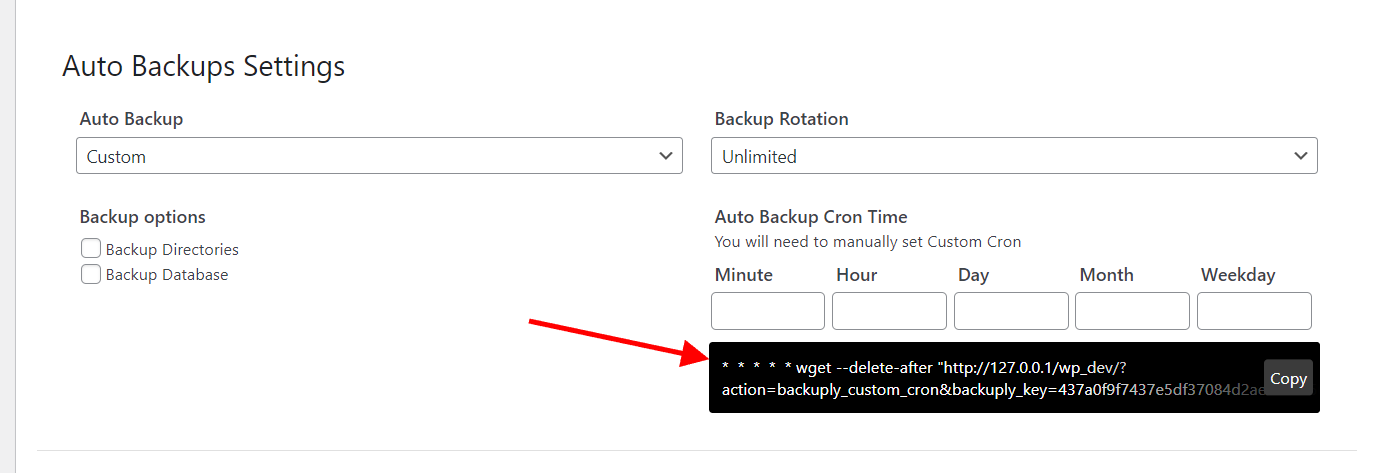
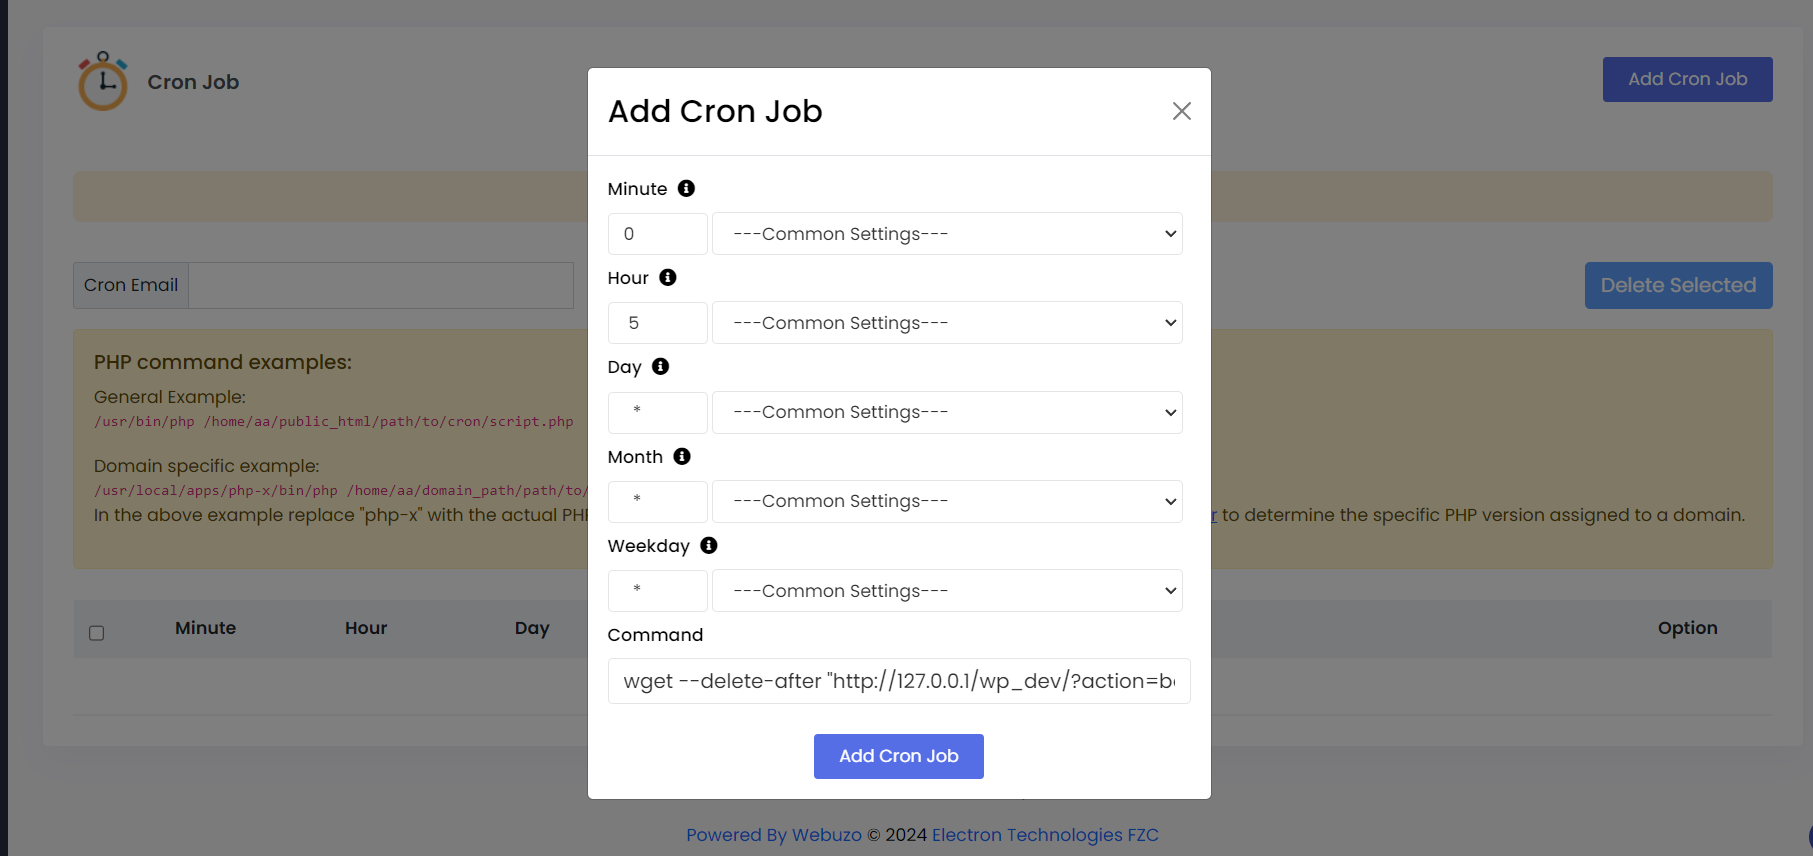
So setting up a Cron Job requires 2 components, first being the time you want to set the cron to and the second being the command.
So lets first know how to get these two components. For that follow the steps below:-

Before version 1.2.4

Since Backuply version 1.2.4
NOTE: If you are on Backuply version 1.2.4 then you wont need to do the next 2 steps. Just skip those and directly save the settings.
So as you can see we are using wget, it is a utility which most probably would be enabled on your server. It's being used to send requests to Backuply. And then you see a --delete-after flag, what it does is it dose not created any log of the process, as it's a cron logging it will fill up your server with unnecessary log files.
After that there is the URL to initiate Backuply inside the double inverted commas.
Now we have command with us and we have enabled custom auto backup on Backuply now we can setup the cron job.

And that's all you need to do, you can test if Backuply is accepting the command or not by going to a new browser window and pasting the URL inside the command we pasted. And then see if the backup starts.
If you face any issue feel free to contact out support at support@backuply.com

