Overview
DigitalOcean is one of the popular Cloud service provider. So in this guide we will help you setup DigitalOcean on Backuply.
Here we are assuming that you already have your DigitalOcean account setup.
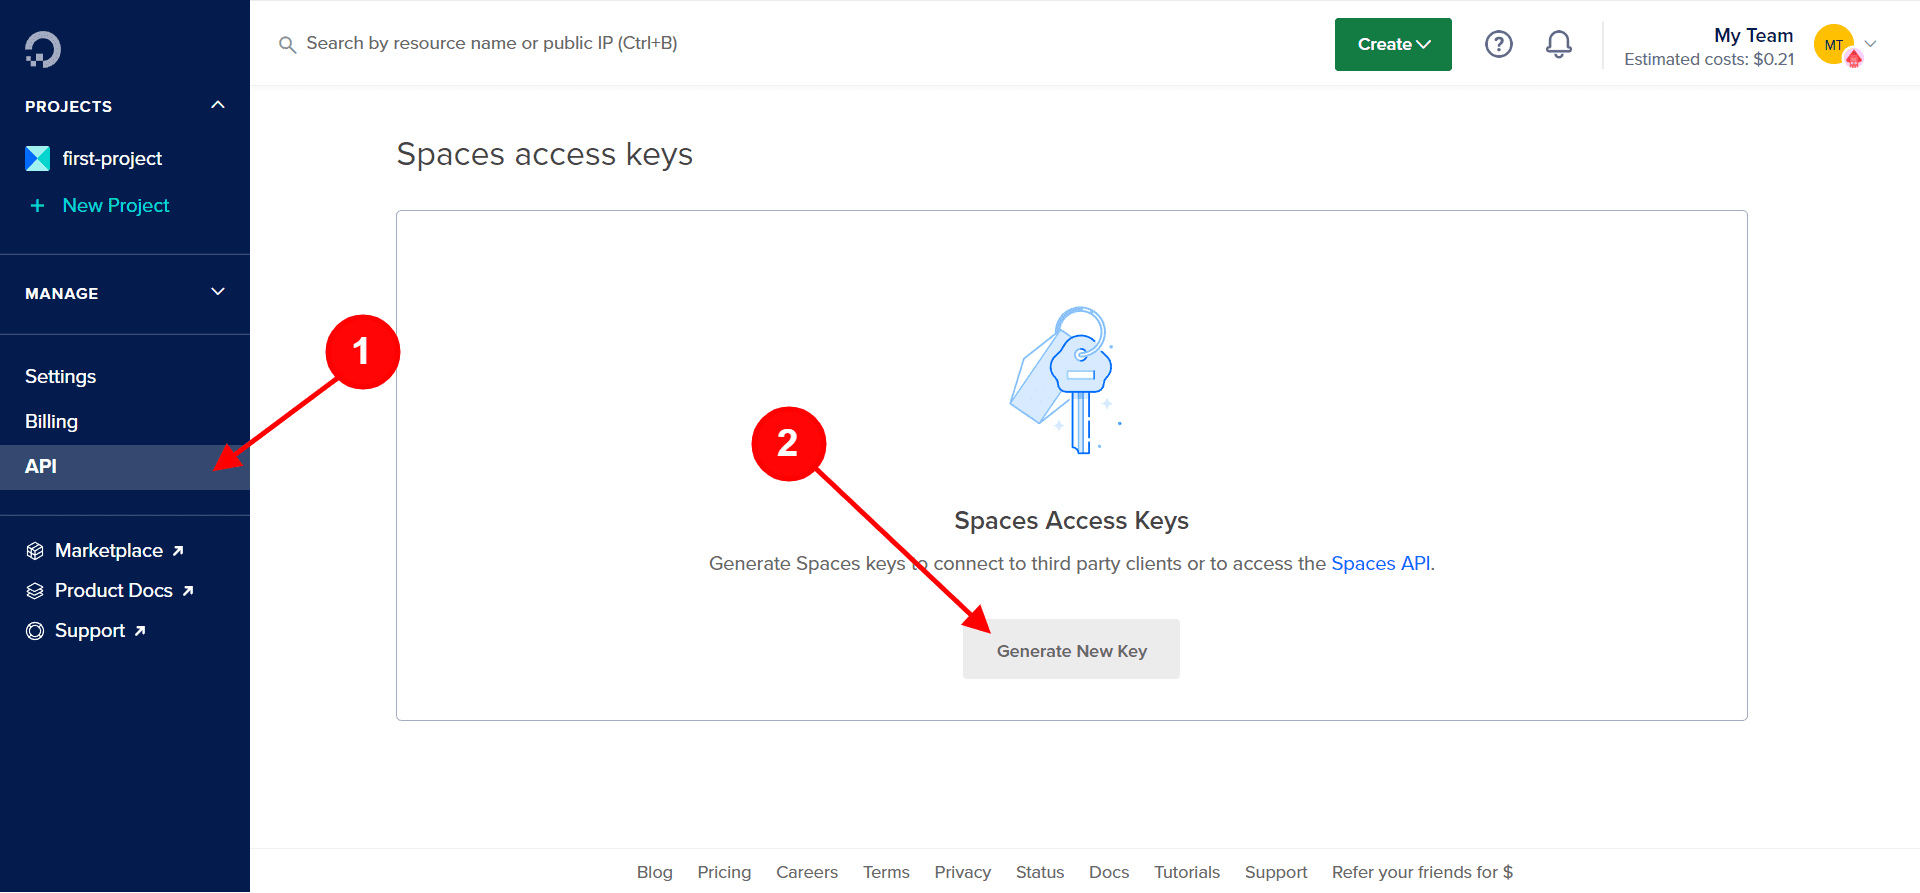
creating Spaces Access Key
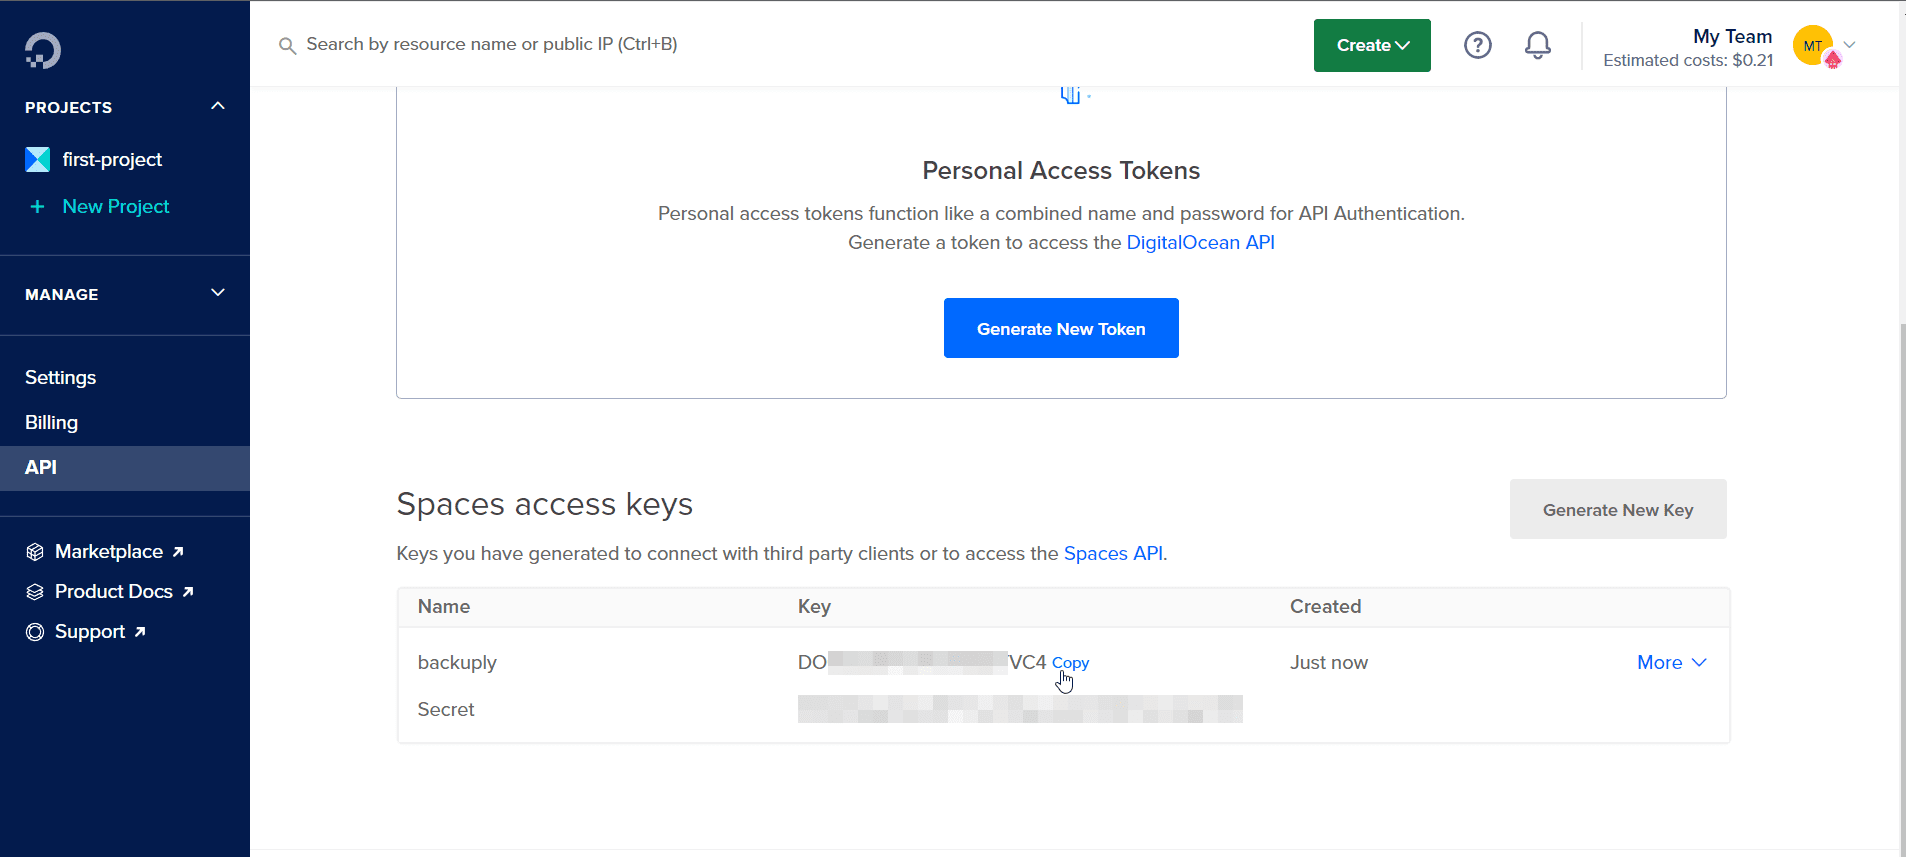
Once you have setup DigitalOcean Account you will need to create Spaces Access Key. To create spaces access key do as follows :-

Once the Key is generated, save the Secret key as it is visible only when the key is generated.

Setting up Spaces
Note: Backuply doesn't deletes your Bucket. As DigitalOcean charges per hour bases. We suggest you keep an eye on that so if your bucket is empty make sure you delete it manually on DigitalOcean Spaces if you don't plan to use it.
As you now have got the API we need to setup Spaces on Backuply. So for that do as follows :-
For the End Point field you need to know the endpoint of a specific region. So end point in DigitalOcean Space is {region}.digitaloceanspaces.com.
To get the region refer this guide Spaces Region Details. As of now the available regions are NYC3, SFO3, AMS3, SGP1, and FRA1 so choose one that you feel that best suits you.
We will be taking the example of sgp1 which is the Singapore region. So then the endpoint will be sgp1.digitaloceanspaces.com
Once you have filled all the information click on Add Backup Location. And that's it. If you filled correct information, then your backup location will be added and now you can create your backup. If you are not familiar with how to backup your site with Backuply then check this guide How to Backup a WordPress site
If you face any issue feel free to contact out support team, we will help you out.

