Overview
Cloudflare has been widely used for it's CDN and DDOS mitigation service and now they even have a AWS S3 API Compatible Object Storage Service too. So in this guide we will help you on How to setup Cloudflare R2 on Backuply.
1. Go to Cloudflare Dashboard and there in the Left Navigation go to R2.
2. In R2 look for Account ID, account ID will be used to create the end point as endpoint in Cloudflare R2 is <ACCOUNT_ID>.r2.cloudflarestorage.com
3. Now we need to create API token so on same page look for Manage R2 API token and click it.
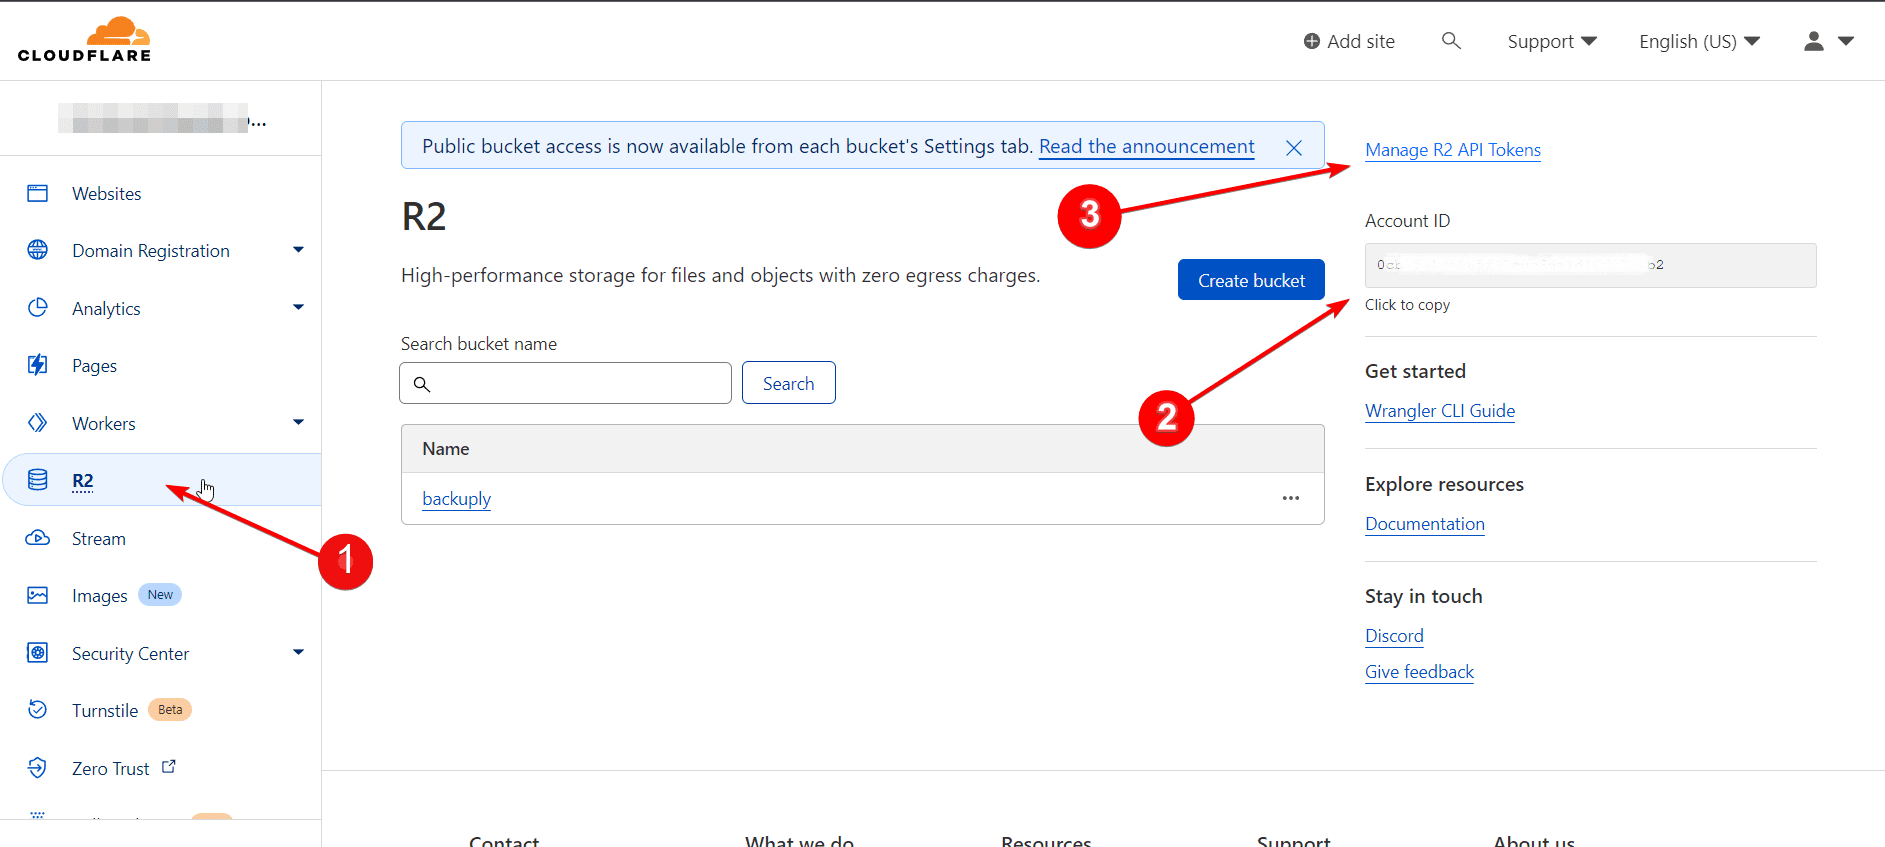
4. Once you click Manage R2 API token you will be taken to another page where click on Create API token button

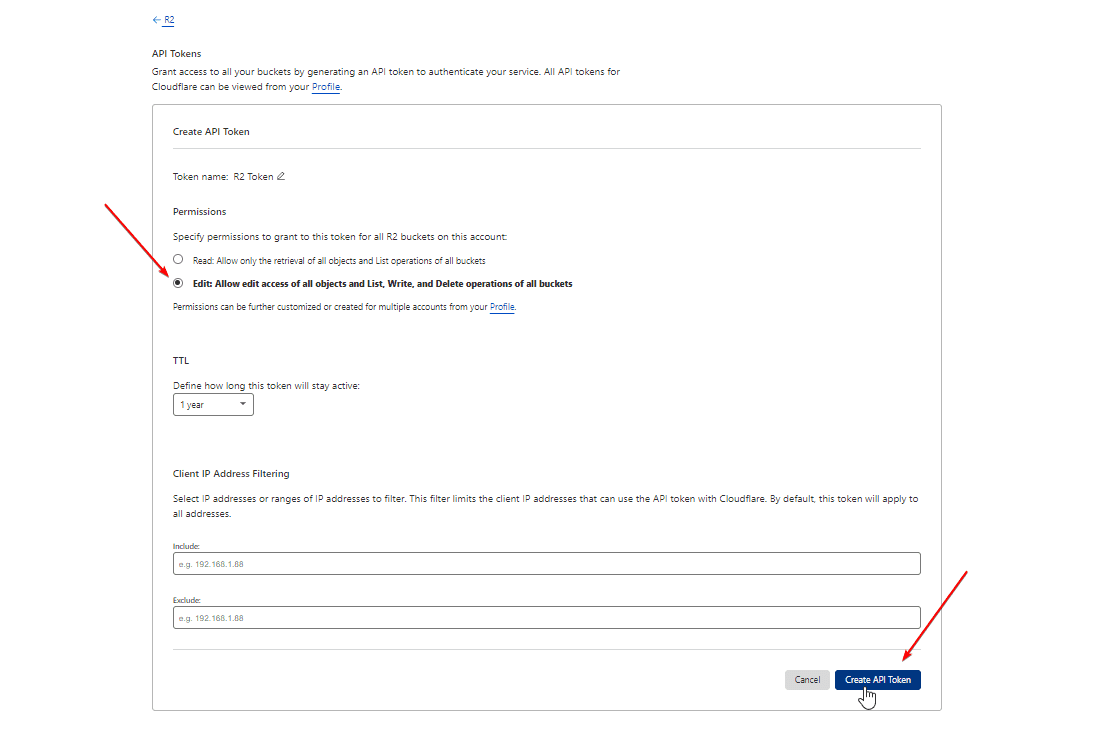
5. Now a form will open in that set Permissions to Edit and that's it Click on Create API token.
You can change other settings as per your choice but you will need to set permissions to Edit for Backuply to Work Smoothly.
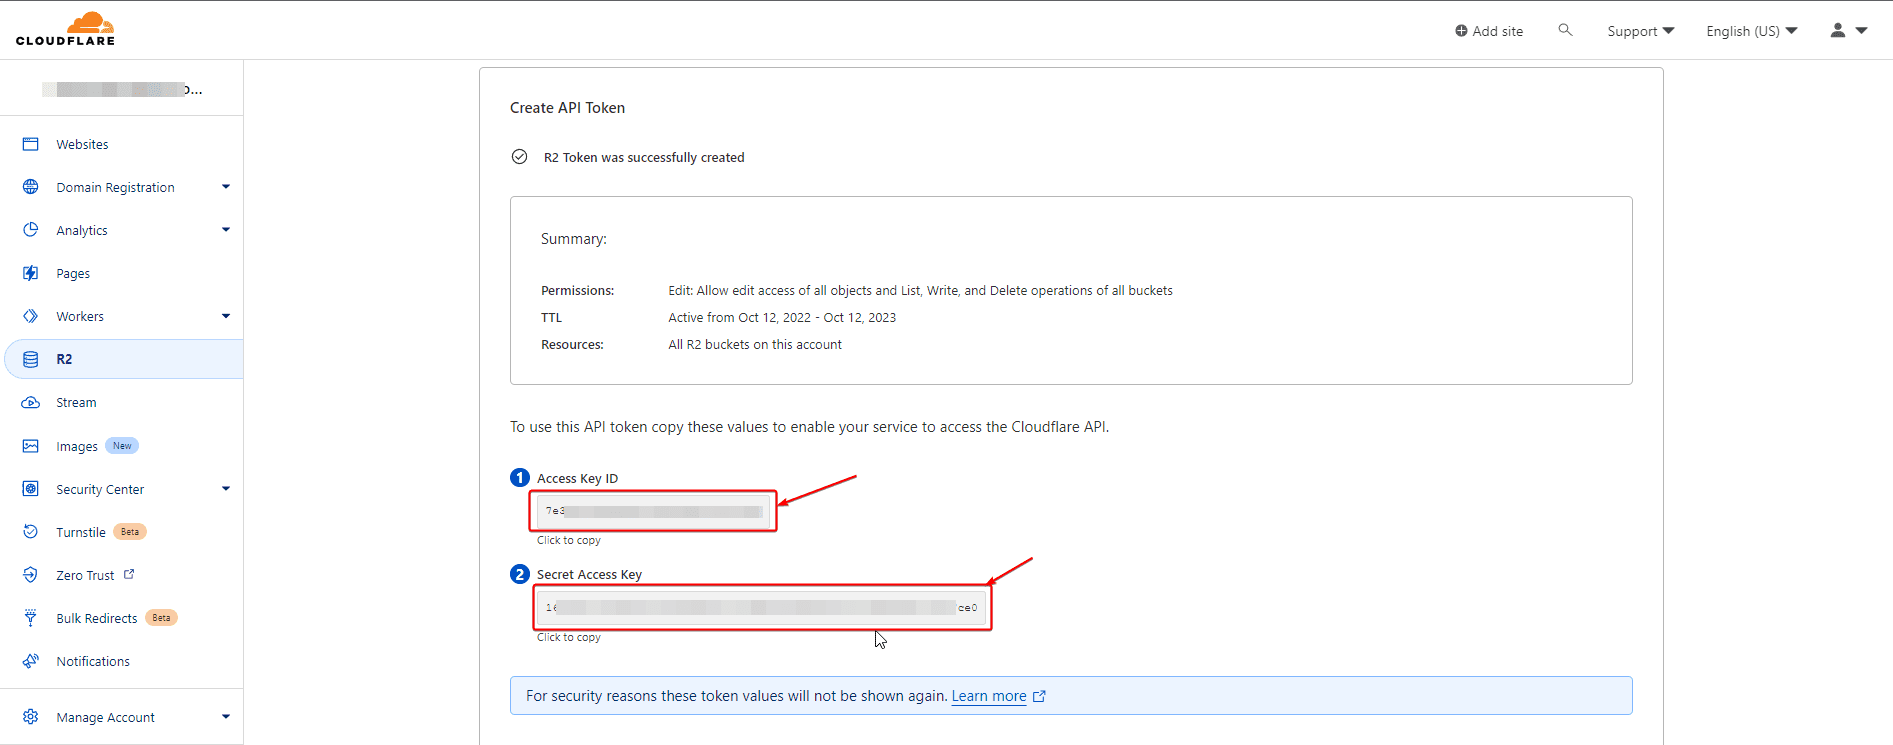
Now we have everything we need to setup Cloudflare R2 on Backuply. And Make sure you save the API token somewhere secure as Cloudflare won't show that token again.
Setup Cloudflare R2 on Backuply
1. On your Admin Dashboard >> Backuply >> Backup Location Tab.
2. On Backup Location Tab Click on Add Backup Location Button.
3. A form will pop-up, in that you will need to select Protocol as S3 Compatible Storage, Select Cloudflare R2 in S3 Compatible Storage option.
4. To fill the Endpoint field you will need Cloudflare Account ID which you can see above where you can get it. So the endpoint will be <AccountID>.r2.cloudflarestorage.com
5. Now fill other details like Access Key, Secret Key and Bucket name and then Click Add Backup Location button.
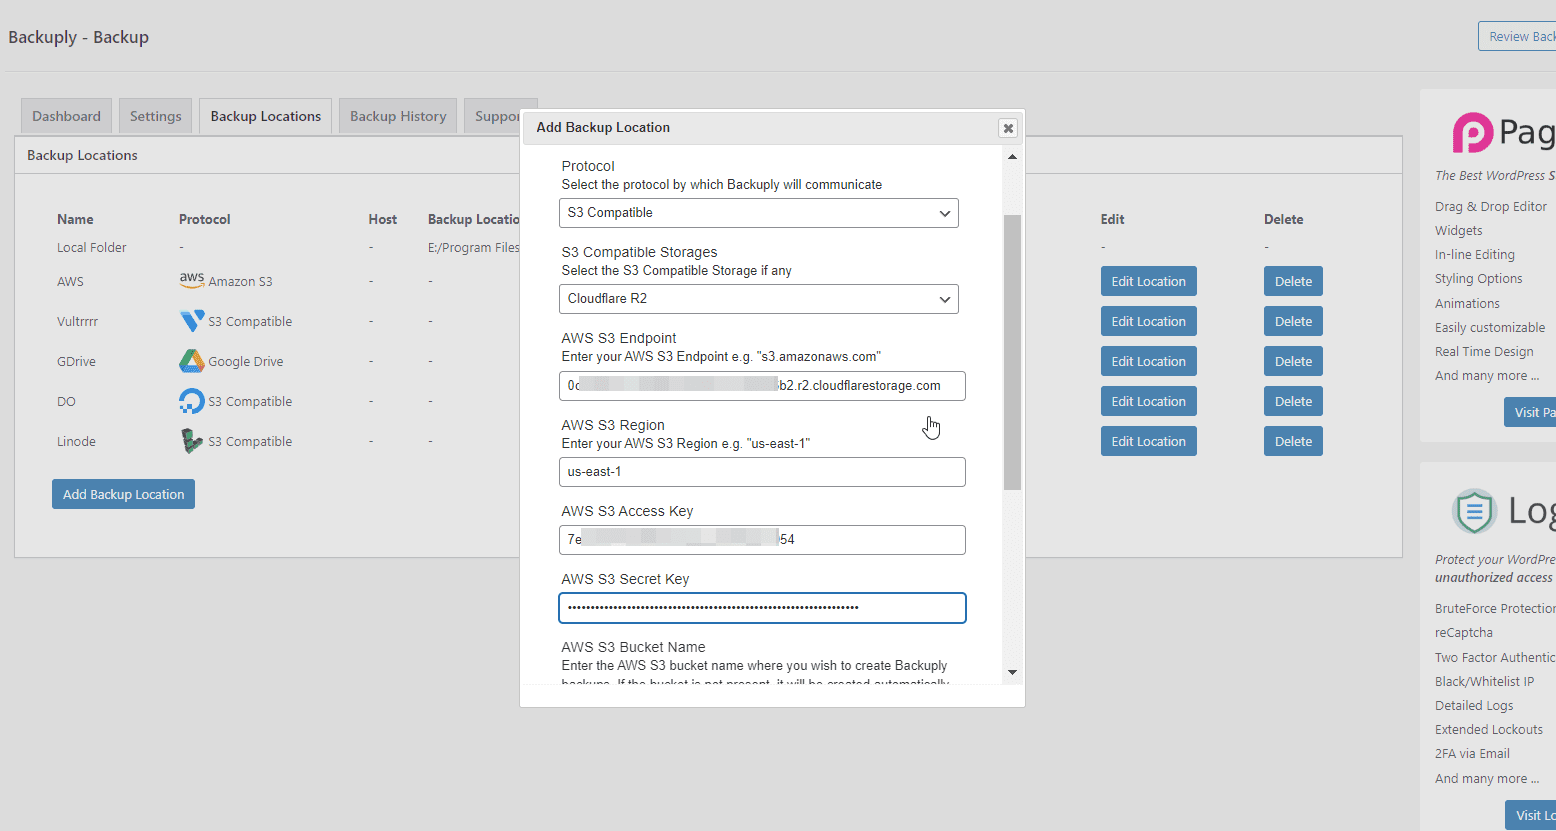
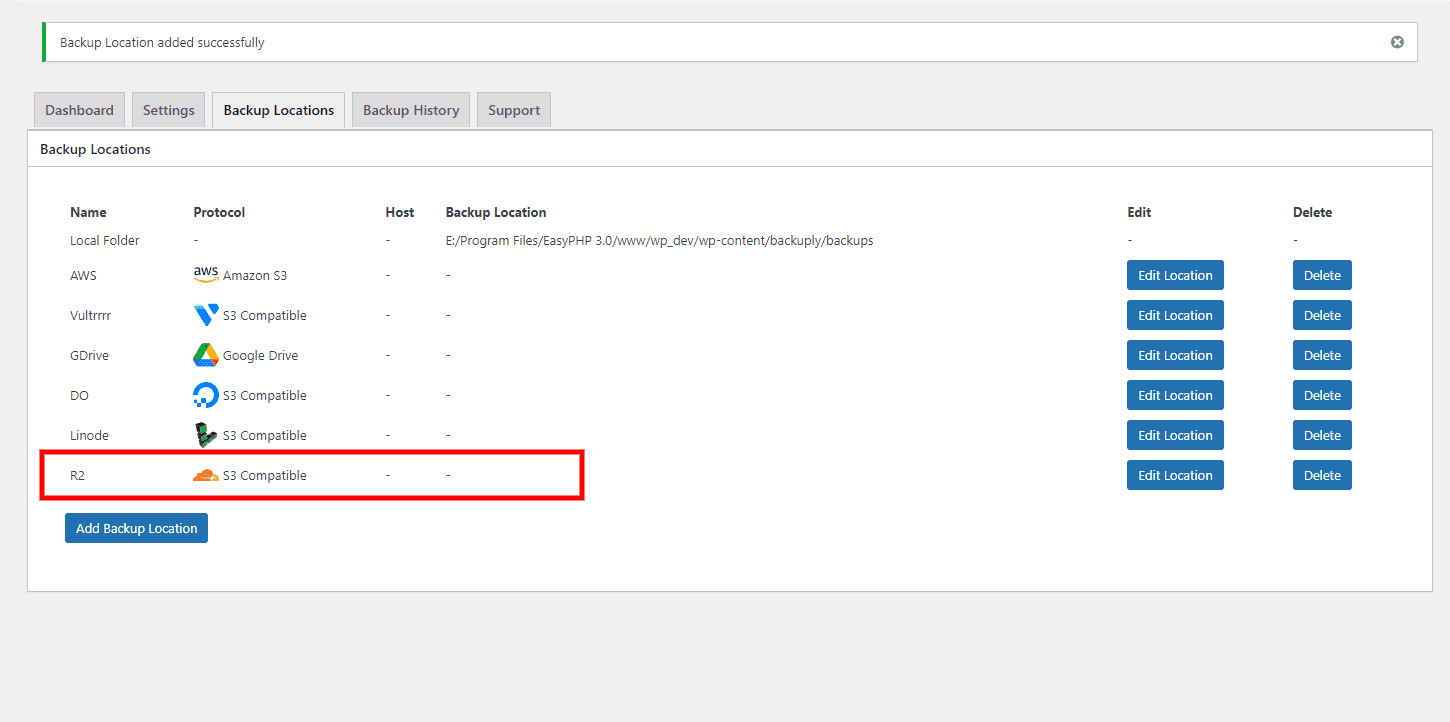
That's it Cloudflare R2 has been added as a Backup location as shown below.
If you face any issue feel free to contact our Support team, we would be glad to help you out.

