
Overview
The Add Backup Server feature in the End-User Panel allows users to connect and configure a new backup destination. Backuply supports multiple storage types, including SSH, FTP, Amazon S3 and S3 Compatible, Google Drive, and OneDrive, enabling flexible and secure backup management.
Add Backup Server
Navigate to End-User Panel ➝ Backup ➝ Add Backup Server
- Enter the required backup server details:
1) Name – Give a unique name to identify the server.
2)Type - Select the type of backup storage from the dropdown (e.g., SSH, FTP, Amazon S3 and S3 Compatible, Google Drive, OneDrive).
3)Hostname – Enter the server IP address or hostname.
4)Port – Specify the port number (e.g., 22 for SSH, 21 for FTP).
5)Username – username used to connect to the server.
6)Password – Enter the password for authentication.
7)Backup Location – The directory path where backups will be stored.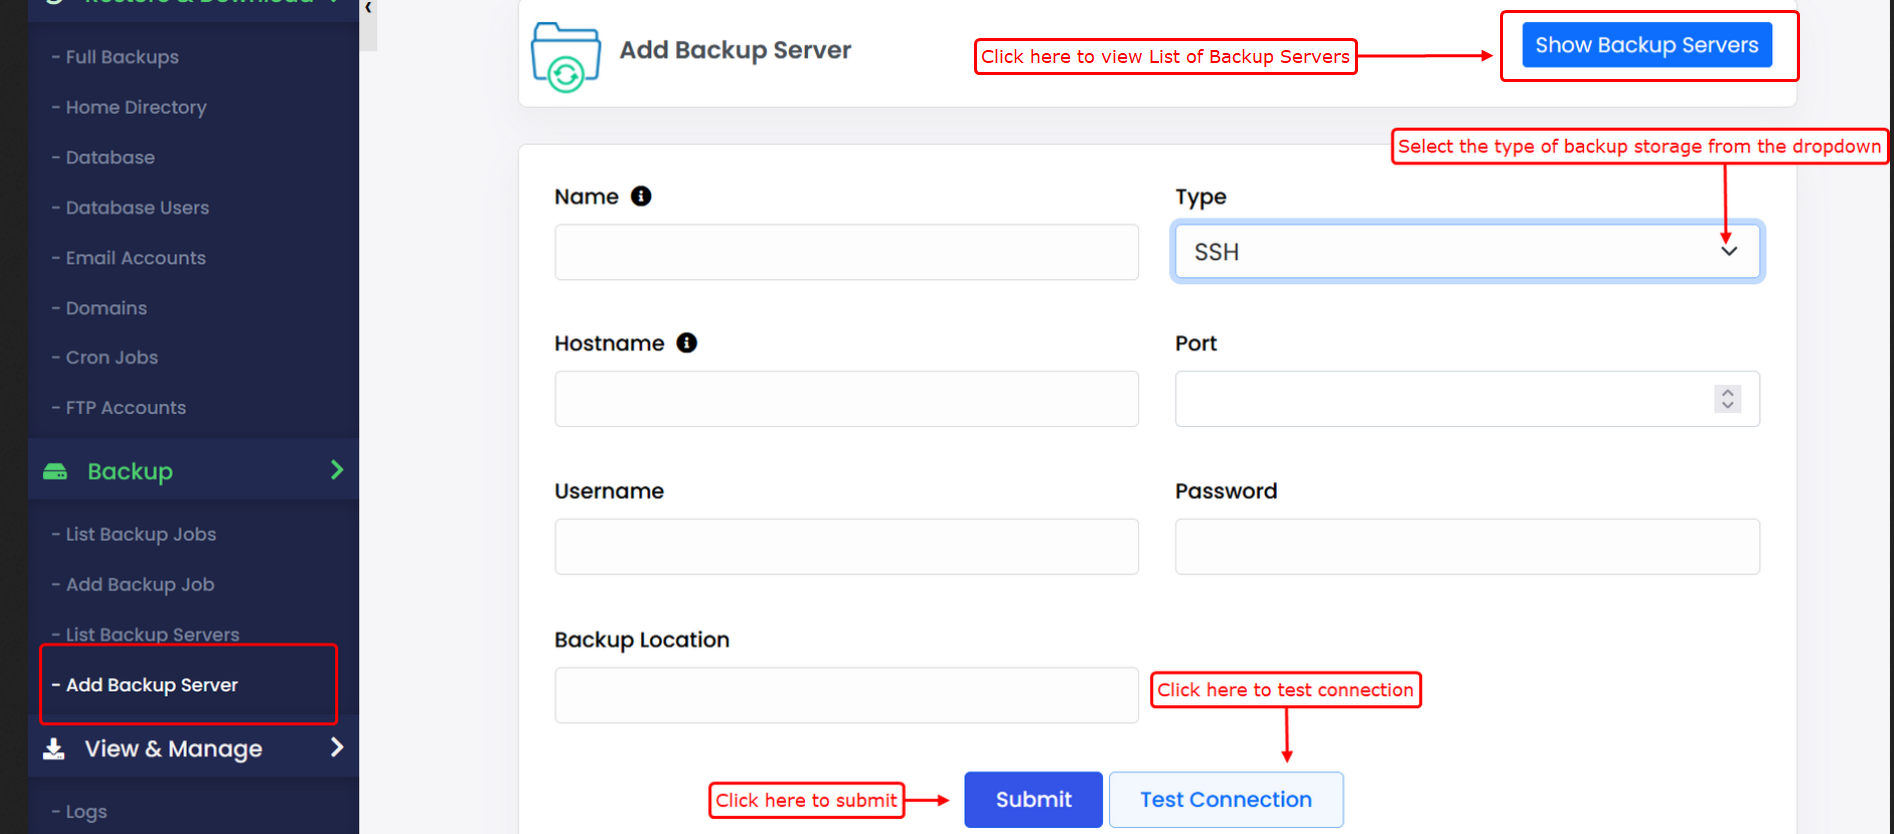
- Click on Test connection to verify if Backuply can connect to the server.
1) If the connection is successful, a green “Connection Successful” message will appear.
2) If it fails, a red “Connection Failed” message will be shown, with error details.
- Only if the test is successful, click the Submit button to save the backup server configuration.