

Overview
Setting up a Backup Schedule
We are assuming here that you are using Backuply Pro.

Backup Rotation
There is one more option in Auto Backups Settings that is Backup Rotation.
So lets say, you turn on your Auto Backup, so it will keep creating backups after given interval as long as you don't stop it, so Backups will keep filling your chosen storage which can be an issue for some, So what Backup Rotation does is that it lets you decide how many Auto Backups you want to keep and discards old once. Backup rotation supports up-to 10 backups if you need more than that just set it to unlimited(i.e; No backup will be deleted).

Example of Backup Rotation :- Lets say you set Backup Rotation to 3, so it will delete older backups after the Auto Backup created for that location reaches 3 Backups, So when any new backup will be made it will delete old once, keeping just 3 newest Backups.
Custom Auto Backup
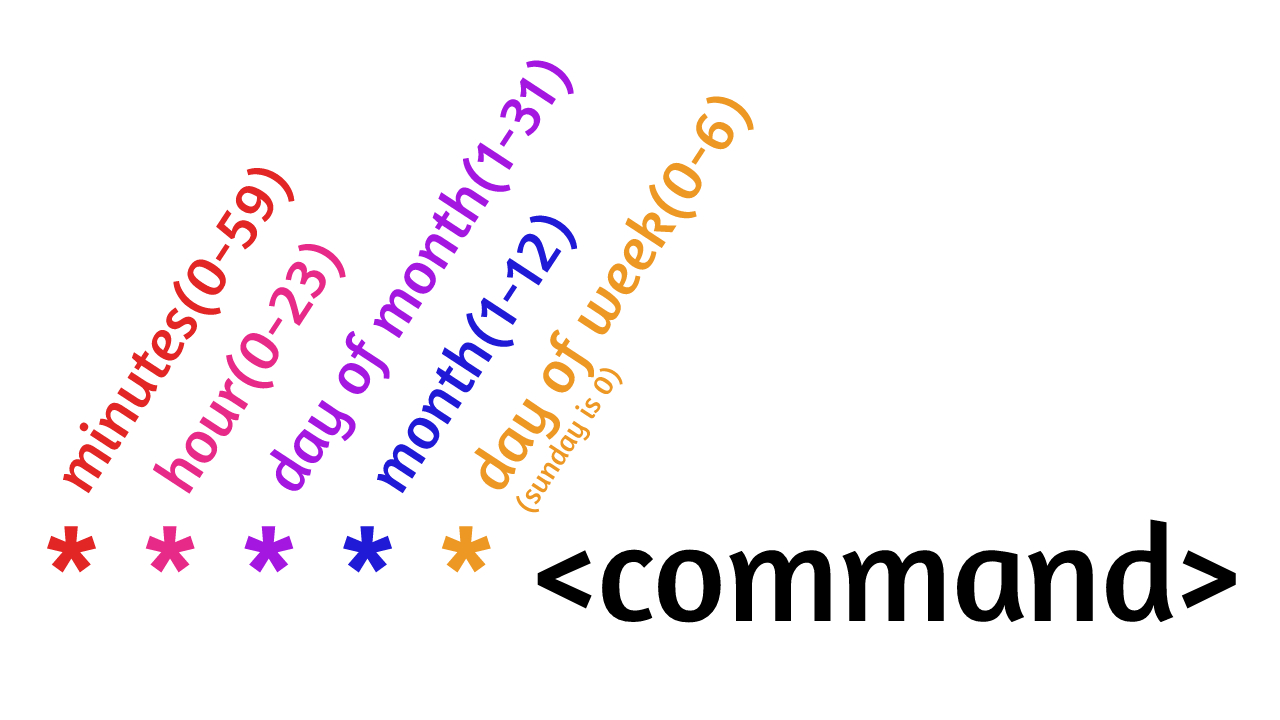
So in case the time intervals we have defined aren't enough for you, then Backuply supports CRON Jobs, you will have to set it manually on your control panel. For that just set the Time values based of the CRON, which you can understand from the image below.
Note: Your server need to have wget installed on it for this Custom Auto Backup to work
Now after you have have set the time, you can copy the command and set it in your control panels CRON job, so that cron will execute our given command based on the given time interval.
Now lets take an example in the image below we have set a CRON time of 5 0 * 8 * so it will run at 00:05 in August.

That's how you can schedule a Backup in Backuply, if you face any issue feel free to contact out Support team, we will be glad to help you out.